Hey everyone, hope you’re having an incredible day today. Today, we’re going to make a distinctive dish, homemade kimchi in switzerland!. It is one of my favorites. For mine, I will make it a bit tasty. This is gonna smell and look delicious.
Best tasting Kimchi I ever had! Seriously everyone needs to buy this kimchi and the service is absol.utely top notch, it's like buying food that your best friend lovingly prepared for you.why are you still reading this? This easy homemade kimchi recipe (created by "Maagchi") is SO GOOD!
Homemade Kimchi in Switzerland! is one of the most favored of recent trending foods in the world. It is appreciated by millions daily. It is easy, it’s fast, it tastes yummy. Homemade Kimchi in Switzerland! is something that I have loved my whole life. They’re fine and they look fantastic.
To get started with this particular recipe, we must first prepare a few ingredients. You can cook homemade kimchi in switzerland! using 18 ingredients and 31 steps. Here is how you cook it.
The ingredients needed to make Homemade Kimchi in Switzerland!:
- Prepare Napa cabbage/ Chinese cabbage
- Take salt (recommend sea salt)
- Get <Kimchi glue >
- Take x 15 cm Dried kombu
- Make ready rice flour / starch
- Make ready water
- Get <Yangnyeom / Kimchi paste>
- Take red chili pepper flakes
- Prepare anchovis
- Prepare fish sauce
- Make ready sugar
- Prepare / 1.5 cup apple / apple sauce
- Prepare garlic
- Prepare grounded ginge
- Take daikon radish
- Prepare carrot
- Take chives / wild garlic
- Get sesame oil / toasted sesame
Enjoy this as a low carb & paleo dinner side. The process of making the kimchi was exactly that - a process. Make the kimchi: Pour gochugaru into a large mixing bowl. Add all ingredients except for the radish and scallions.
Steps to make Homemade Kimchi in Switzerland!:
- Ready the cabbage night before.
- Using knife to make cross cut on the bottom of the cabbage.
- Tear them apart into quarter. Repeat the process.
- Cut the bottom stem.
- Chop them into little bigger than bite size.
- Put cabbage into big case or in my case cleaned sink. Sprinkle salt and give cabbage a masssage.
- Put all cabbage into a drain bowl or case to drain all the excess water from cabbage. Make sure you put something heavy on top to help drain over night.
- Cabbage : next day (most of the water was drained)
- Wash the cabbage throughly and squeeze. Leave the cabbage and help dry naturally.
- Prepare the kimchi glue. Put dried kombu into the water minimum 30 minutes to get bigger and softened.
- Once kombu is bigger and softened, put all into a pot and start heating with low heat. Stop the heat once it’s started to bubble. (I did too much)
- Mix rice flour or starch with water (not in the ingredients list).
- Pour the mix into the pot.
- Turn on the heat (low) and mix continuously until it becomes glue texture. Leave it aside.
- Start making kimchi paste.
- Chop daikon radish, carrot and chives/wild garlic into 10cm long stick.
- Sprinkle the salt (not in the ingredients list) and give it a massage. Leave them for minimum 30 mins to 1 hour to excess water.
- Grind ginger and chop the garlics.
- Add apple sauce. If you are using fresh whole apple, put ginger, garlic and apple into blender and make paste.
- Chop anchovies and add to the bowl.
- Add fish sauce, sesame oil / toasted sesame, and sugar.
- Mix all well.
- Prepare chili flakes. Pour chili flakes into the paste. (in my case it my bowl was too small so I sprinkle the rest of chili into veggies)
- Paste with chili, veggies with chili, and glue.
- Mix them all well. This is the yangnyoem aka kimchi paste.
- Mix the cabbage and yangnyeom.
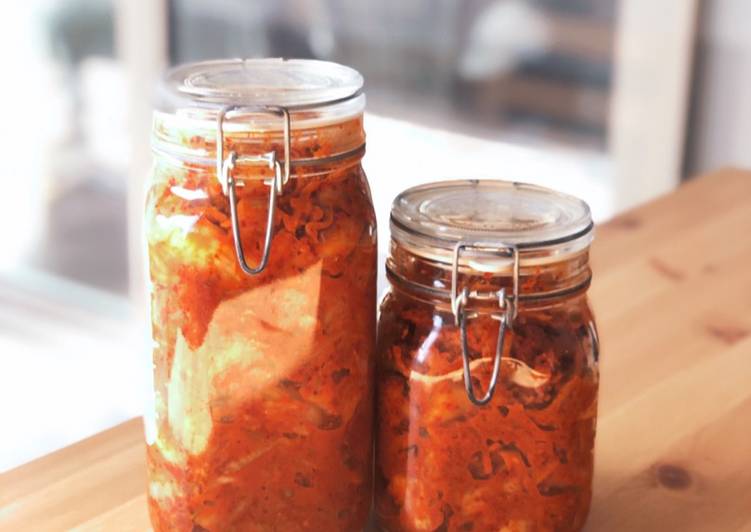
- Start putting them in a jar.
- If you got left over yangnyoem, do not throw. Please keep in another jar or ziplock bag. You can use this yangnyoem to pickle other ingredients!
- Leave bottled kimchi in room temperature for a night. This will help kimchi fermentation.
- You can store them in a fridge. Also can enjoy after 2-3 days. Best starts after a week.
- Make sure you will open the jar everyday to let gas go. I usually open every morning and mix inside to let go the gasses.
The kimchi will start fermenting a day at room temperature. Once it starts to ferment, store in the refrigerator to use as needed. Kimchi or kim chee is one of the most popular Korean foods. This quick and easy recipe results in authentic, raw, probiotic Kim Chee. Homemade kimchee is perfect for vegetarians, vegans, raw foodists, or just people who'd like to get some digestive probiotics into their diet from cultured foods.
So that is going to wrap it up with this exceptional food homemade kimchi in switzerland! recipe. Thanks so much for your time. I’m sure you will make this at home. There’s gonna be interesting food in home recipes coming up. Don’t forget to save this page on your browser, and share it to your loved ones, friends and colleague. Thank you for reading. Go on get cooking!